Saturday, October 31, 2009

Happy Halloween...and Welcome to November!

Happy Halloween, everyone! Just a quick post tonight--getting pretty sleepy here!

All the trick or treaters have long gone home, my family's watching "The Sixth Sense"--I've seen it a couple of times, and it's one of those that I can't watch too often, know what I mean? The girls have never seen it before, though, so.....

I was hoping to watch one of my favorite Halloween movies tonight--"Arsenic and Old Lace"...it's just wonderful! Cary Grant--isn't he just the best?! Maybe tomorrow...!

Here's my girls tonight--not the best photos ever, but since I added pictures of them when they were young, I couldn't very well leave them out now!

Annie had a friend over--Emma the bee on the left, and here's Sarah in the middle, and Annie, my cute little witch. Her other pictures didn't turn out very well, so just a group shot for her tonight!

Sarah, my 14-year-old, was an "In-N-Out" employee--do you know the restaurant? It's a pretty famous burger joint--originally just in California, but now spread out through the western states. Fabulous burgers! She made her own apron, so I was pretty proud of her for that!

They gave her their hat last time she was there, she bought a t-shirt, made the apron, and she's good to go!

One last thing....thought you might like the recipe for some pumpkin pancakes that I made for my family (and 5 other girls that spent the night!) this morning. They were absolutely DELICIOUS!!! I didn't manage to get a picture of them because, well, I was MAKING them, and they were devoured pretty quickly. That's what it's all about! Found the recipe online. It was originally printed in Bon Appetit magazine in 2000.

SPICED PUMPKIN PANCAKES

1 1/4 cups flour
3 Tbsp. sugar (I used 4 Tbsp. BROWN SUGAR)
2 tsp. baking powder
1 1/4 tsp. pumpkin pie spice (I used 2 1/2 tsp.)
3/4 tsp. salt
1 1/3 cups milk
3/4 cup canned pure pumpkin
4 large eggs, separated
1/4 cup (1/2 stick) unsalted butter, melted
1 tsp. vanilla
(I added cinnamon baking chips--of course!)

Whisk the first 5 ingredients in a large bowl to blend. Stir milk, pumpkin, egg yolks, melted butter, and vanilla together in a separate bowl. Add the pumpkin mixture to the dry mixture, stir until smooth--batter will be thick. Using electric mixer, beat the egg whites in a separate bowl until stiff, but not dry. Fold egg whites into batter. Then cook up those fabulous flapjacks!

In reading some of the reviews on the recipe, some said the pancakes were fabulous, others said that they weren't spicy enough--so I added more! I also thought that brown sugar had a bit more depth and flavor and would work really well...and it sure did!
Serve with real maple syrup, of course! You will LOVE these! I will be making them again ridiculously soon!

And now it's 12:01 am--which means HAPPY NOVEMBER! Can you believe it? Time to start planning that amazing homemade Thanksgiving meal I know you're all dreaming of--can't wait!

I'll be back tomorrow with a card or two, but for tonight, sweet dreams!

Friday, October 30, 2009

Apple Puff Pancakes, Birthday Card, and Happy Birthday, Mom!


Happy Halloween Eve! I'm grabbing a quiet moment to post this while my 13-year old daughter, Annie, and 5 of her friends are out on the trampoline telling scary stories! My husband and older daughter, Sarah, are at our high school's Homecoming game. Peace & quiet....for a few moments!

Well, the day started out in the SWEETEST way possible...Apple Puff Pancakes, courtesy of The Farm Chicks! I've made this recipe about 5 times now, and it has been perfect each and every time--an absolute family favorite! It tastes amazing, but is super easy to prepare--just takes a few minutes, really!

Backing up...my good friend, Loretta, has been in love with The Pancake House restaurant forever (a few locations throughout the country)--she introduced me to it when we went to Salt Lake City together last year for a convention. The menu item she said I HAD to order was their apple pancake. It was delicious! I've had it 2 times since then, and wanted to try to figure out the recipe.

Then, this summer, I discovered The Farm Chicks' new cookbook:

I mean, really...how could I NOT buy a book this adorable when it's just staring at me from the shelf at Barnes and Nobles? I HAD to buy this book! Little did I know how much I would enjoy it! I've made quite a few recipes just since this summer, and every one of them has been scrumptious!

Okay, back to Loretta...I told her a month or so ago that I'd finally found THE recipe. She was exceptionally doubtful! So, I was forced to invite her over to breakfast to prove it to her. That day was today!

I timed it perfectly so that the pancake came out of the oven about 3 minutes after she walked in my door. The kitchen smelled divine! She was pretty impressed when she saw it...


Oh, my! Look at it sizzling in the pan! Then I drizzled a little glaze and some maple syrup over it, and Loretta was a goner!


Here's my happy friend enjoying her SECOND serving...!

She pretty much wanted to lick her plate, but decided to vigorously scrape it clean with her fork, instead!

Loretta agreed, as I do, that this recipe for Apple Puff Pancakes is just as good (I think better!) than the restaurant version--not bad, huh? Would you like the recipe, too?! Here it is: (thanks, Serena, for letting me share it here!)

APPLE PUFF PANCAKE

(from "The Farm Chicks in the Kitchen" cookbook)
1/4 cup unsalted butter (1/2 stick)
1/4 cup packed brown sugar
1 tsp. ground cinnamon
1 apple, peeled, cored, and thinly sliced
5 large eggs
1/2 cup milk
1/2 cup flour
Dash of salt
Maple syrup or confectioners' sugar, for serving (Or both, I say!)

Heat the oven to 425 degrees. Place the butter, brown sugar, and cinnamon in a 9-inch glass pie plate. Heat in the oven until the butter is melted and bubbly--5 minutes. Remove from the oven, stir well and mix in the apple slices. Return to the oven and bake for 2 minutes. Meanwhile, combine the eggs, milk, flour, and salt in a blender or food processor and process un til frothy--about 1 minute. Pour over the apple mixture. Bake until the cake is puffed and the center is set--18 to 20 minutes. Serve warm with maple syrup or sprinkled with confectioners' sugar.

*****************************************
Today is a VERY special day--my Mom's birthday! Hi Mom! My Mom has always loved having her birthday be the day before Halloween. She loves fall, loves to decorate, loves Halloween...it's a perfect fit! This may be the first time I haven't made her a Halloween themed birthday card, but when I got this new Crafty Secrets' "Best Buds" Vintage Postcard Kit, this sweet image just seemed perfect for Mom.

Isnt' she sweet?! Mom loves images like this, so, here you go, Mom! (Of course she's getting the real deal!)


Didn't go overboard with the glitter this time...wanted to be a bit more delicate. I used "Waterfall" Stickles for the dots here, and a little Dazzling Diamonds sprinkled on the flowers. I did use some silver glitter for a little outlining, but not much. The birthday sentiment at the top of the card is from the Pink Persimmon stamp set "Vintage Greetings"--love this sweet font! The little flower stamp underneath the greeting is from the mini stamp set included in the "Best Buds" postcard kit--just perfect for this!

As I like to do, I want to share a few pictures of my Mom with you in honor of her birthday. I just love these photos of her when she was a little girl. Mom, since I realize you ARE still a little girl at heart (she STILL loves dolls like she always has--just bought one for herself for her birthday, as a matter of fact!), these are for you!


This may possibly be my favorite picture, ever!


Thanks for visiting me today, I love that you come, and I enjoy all of your lovely thoughts and comments--thank-you all so much!

And...Happy Birthday, Mom! I LOVE YOU!

Play Date Cafe' Challenge #2!

Good evening, all!

A nice, late post to get my entry for the Play Date Cafe' challenge entered. This was another fun one, hosted by Sarah. The challenge (they are all color challenges) is to use black/brown, orange and yellow--the colors are up to individual interpretation--not a certain companies colors, etc. If you haven't checked it out yet, come on over! The ladies are so friendly and welcoming, and all styles of creations are accepted. This is only Week #2 of the challenges, so jump on in!

Without any more chatting about it, here's my entry for the challenge:

The last Halloween card of the year, I'm pretty sure! Thanks for a wonderfully fun challenge once again, ladies! Hopefully I'll link this up right this time!

Thursday, October 29, 2009

A Baby Book for a Baby Boy, Learning from My Mistakes, and Great-Grandmother's Yummy Popcorn

Good evening, all! It's a pretty late post tonight after a fun, busy day! Hope the day was great for all of you!

Lots of pictures to show you tonight--finally finished a project for my sister who had a new baby boy--her first child--last week. I used the new Crafty Secrets' Vintage Postcard Kit--"Baby Boy"--perfect, right?! I decided to make a little book for her to add little pictures, hospital bracelet, whatever she wanted.


This is the "cover" of my little book--each image is just so sweet!


Look at those little pink cheeks!


I finished the back of each chipboard piece with some Crafty Secrets' paper, sponged with Rangers' Vintage Photo ink, then used the adorable little stamps in the mini set included with each Postcard Kit to decorate. I'm just showing the last "page" here--didn't want too many pictures here!

This was just so much fun to do.....but after I was finished, I realized I'd goofed. This is not really an uncommon occurrence for me, sad to say! But this time, instead of ripping everything apart and starting over, I just took a big breath, told myself it was okay, and moved on.

I realized my sister will love it anyway, and I learned something from it--it's not a big lesson, but a lesson learned, nonetheless!


I'm sure this is something you're all very careful about already--but--while carefully finishing the back of something--turning it often to make sure you're not doing the back upside-down, remember that if you're making a little book, you WANT the back to be upside-down so that the pages will be facing the same way! Oh, well--it's still cute! (Just look at that adorable little stork stamp!)

There are six images in each Postcard Kit, along with twelve little images in different shapes, and coordinating pieces of chipboard for finishing each one. I used almost all--saved one image for me, just because I love it so much--I'll show you later (my sister will never know!)

Here's what I did with the other two:


I thought this would be cute to hang on the baby's room door--"Don't wake me, I'll wake you"!

(This is a really pretty brown & cream gingham ribbon, but it looks black & white here!)


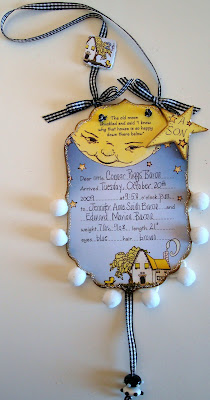
Just a little wall hanging for over the cradle--a mini birth announcement with the most adorable man in the moon and cute little cottage below...


It says, "The old moon chuckled and said, 'I know why that house is so happy down there below.'" So sweet...!

Well, I hope they like these little handmade gifts--wish I could deliver them in person and kiss my newest little nephew, Connor.

Now for something sweet! This recipe comes to you from my Great-Grandmother, Anna Ostlund. What a wonderful woman--barely 5 feet tall, and so full of love for everyone! If you've been reading my blog since I started a couple of months ago, the antique doll from the 1890's I talked about was hers when she was a little girl. Here's Anna with her husband, Hjaldermar, and young family about 1910:

Aren't they all just so beautiful? This was a just a year or so before my Grandfather was born. I really love this picture...

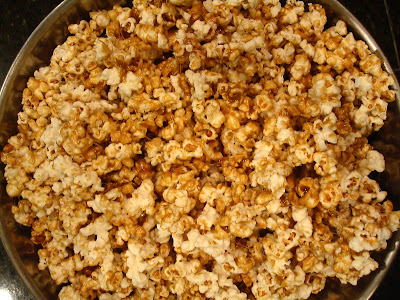
Here's Grammie's recipe for, as she called it, "Yummy Popcorn":


YUMMY POPCORN


1 stick butter
1/2 cup brown sugar
7 large marshmallows
2/3 cup popcorn (un-popped measurement)

Pop corn--(I don't use microwave popcorn for this--just feels better to do it on the stove for an old recipe!)

Combine all ingredients (except the popcorn, of course!) in a heavy-bottomed saucepan. Heat and melt, stirring constantly, until sugar is dissolved and marshmallows are completely melted.

Pour over popped corn, mix and enjoy!


The wonderful thing about this recipe is that it doesn't get all hard & crunchy--it stays soft and gooey--marvellous! Just watch out for any un-popped kernels!!!

Well, that's it for tonight. Have a wonderful sleep, and wish you could all join me in the morning for Apple Pancakes! (I'll share a picture tomorrow...!)

Good night!

Wednesday, October 28, 2009

Lots of Sugar, a Little Glitter, and Jane Eyre...

How is everyone tonight? My day got a lot busier than I had planned, and I didn't get some of my projects done...they'll have to wait until tomorrow!

I do have a birthday card, however, for my Mom--Grandma--this one's for the girls to give her. So, Mom, if you're peeking, I'm sorry! A pretty, old-fashioned looking card made very simple by Crafty Secrets' wonderful new "Birds & Blossoms" Creative Scraps. I really love these--so many beautiful images! Just take a look at these:


Aren't they beautiful?!

Here's my card:


Now on to the Halloween goodies! My sister sent me this recipe a few weeks ago, and I've really been looking forward to making it for my family--easy, colorful & fun! My youngest daughter, Annie, has invited some friends over on Friday night to have a sleepover, eat lots of junk food & watch Halloween movies, so this is part of the junk!

What do you think? It tastes like a big cookies & cream candybar with lots of other goodies thrown in! YUM! I'm trying not to eat this, but it's REALLY hard!


A nice close-up shot so you can see the oreo chunks, candy corn, pretzels and Halloween sprinkles....not to mention that fabulously creamy white chocolate.....................!

Here's the recipe:

HALLOWEEN BARK

14 whole Oreos, broken up

1 1/2 cup small pretzel sticks, broken

1 lb. white chocolate

1 cup candy corn

Halloween colored sprinkles

Cover a large cookie sheet with wax paper. Spread broken cookies, pretzels and about 3/4 of the candy corn on the wax paper.

Place white chocolate in microwave-safe bowl and heat for 1 1/2 minutes--stir. Heat for 30 seconds more. Stir until all melted and smooth.

Drizzle melted chocolate over the cookie mix, spreading with a spatula if needed to coat evenly. Sprinkle remaining candy corn and colored sprinkles on top while the chocolate is still melty.

Place tray in refrigerator until firm. Remove and break into small pieces. Try not to eat it all in 5 minutes.....! The kids will love this!

Ready for another fabulous treat? This one comes courtesy of the wonderful Gooseberry Patch ladies, from their "Flavors of Fall" cookbook--one of my favorites! (Remember the Double Chocolate Brownies from last month?!)


I did everything according to the recipe except I added a bag of white chocolate chips...I'm always doing something naughty like that. Just can't seem to help myself!


PUMPKIN SPICE SUGAR COOKIES

2- 3/4 cup flour

1 tsp. baking soda

1 cup butter, softened

1- 1/2 cup powdered sugar

2 tsp. pumpkin pie spice

1 tsp vanilla

1 egg

Combine flour and baking soda; set aside. In another bowl, blend butter and powdered sugar together; add pumpkin pie spice, vanilla and egg. Mix in flour mixture; blend well. Cover dough; refrigerate for 2 hours. Roll dough out on a lightly floured surface; cut into desired shapes with cookie cutters. Bake at 350 degrees on ungreased baking sheets until golden, about 8 minutes. Makes about 2 dozen.

(The added white chocolate chips are delicious in here...also, I don't seem to have the patience to wait for two hours for the dough to chill, or to cut them out with cookie cutters, so they went immediately onto the cookie sheets in ball form. And they needed to bake for 10 minutes. Fat, luscious, moist, and fabulous!)

After they cooled, I decided I needed to add a few more calories, so I made up some Pumpkin Spice Frosting, of course! I never measure this kind of thing, so I just melted about 3 Tbsp. butter, added a bit of vanilla, sprinkled in some Pumpkin Pie Spice, and probably about 3 cups total powdered sugar. Add milk till you get your desired consistency. You can always add more powdered sugar, too!


See all that pumpkin spicey goodness?!

Now that you're all hungry, I'm going to run away and finish watching one of my very favorite movies--the newest Mobil Masterpiece Theatre version of "Jane Eyre"--it's just dreamy! I love the actors, the scenery....just everything! Have you seen this one?


All I can say, is WOW! If you haven't seen it, do yourself a favor and just order it! If we lived closer, I'd let you borrow mine--I'm always loaning out my favorites! Or, I have my friends come over and watch them with me--even better!

Well, until tomorrow. Jane, Mr. Rochester & I have to get reacquainted.....!

Tuesday, October 27, 2009

A Beautiful Sunset, a Little Laughter, and a Color Challenge...

What a beautiful sunset I saw tonight! Don't think I caught the colors as vibrantly as they really were, but here's as good as I've got!


Such beautiful colors streaking across the sky like someone took a giant paintbrush to it...


I'm grateful for moments like these--taking time out of a busy day to savor the beauty of nature and be thankful for it!

Just a short post tonight--got dinner going on the stove...a late dinner for us tonight--had soccer practice and a high school field hockey game against Monterey High School. My daughter Sarah scored the only point in the game! Well done, Sarah!

I've got two cards for you tonight. The first is for the Crafty Secrets challenge hosted by Marcy this week--to make a laugh/smile inducing card--not too hard to do!


This fun little image is from Crafty Secrets' "Storytime" Vintage Postcard Kit. Not hard to see why I chose it for the challenge, is it? I found a fun quote online by Woody Allen & printed it out on cardstock: "I am thankful for laughter, except when milk comes out of my nose." I thought that was apropos and would hopefully produce a giggle or two!


My next card is for the Color Challenge on Splitcoast today--to use Basic Black, Kraft and Cameo Coral--seems like the coral has been chosen a lot lately! After I took these pictures, I added some glitter dots to the black in the center, but the light wasn't very good at that point...so just imagine some silvery glitter dots surrounding the image!

This sweet image is from Crafty Secrets' "Girlfriends" Creative Scraps. She's just so cute & sassy!

Well, that's all for tonight...tomorrow, though, I've got lots for you! Some projects I've been working on, and some yummy Halloween treats for you to try--just wish you could taste them! Hope you have a wonderful evening--see you all tomorrow!

Monday, October 26, 2009

Queen for the Day, Beautiful Blackwork...and Yes, a Few More Halloween Memories!

Good morning!

Hope everyone had a wonderful weekend! We did, and we're tired this morning! We all woke up late today, but everybody got where they needed to be...just a little panic, that's all!

Let's just jump right in, shall we? I've got a few things for you today...first off, another fabulous new stamp set from Cornish Heritage Farms! Got mine on Friday, and played with it a bit yesterday. Here's the set:


Gorgeous images, aren't they?! Now here's my first effort with it--not sure I'm entirely happy with what I did, but I needed a birthday card, and it fits the person, so...! Next time, I think I'll go a bit more simple--not so busy...


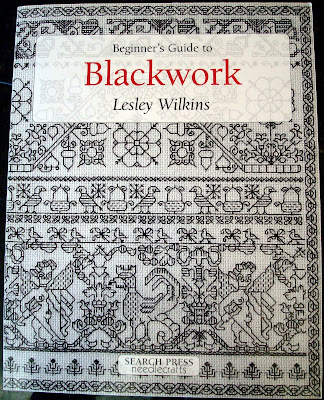
As soon as I saw this set online, I fell in love with it! The first thing that came to my mind was Blackwork--ever heard of it? Here's a book I found years ago that I just love:


I LOVE needlework--always have--and this is a beautiful type of needlework with quite a history....

It's thought that Blackwork originated with the Moors, who introduced it to England in the during the Crusades. Chaucer mentions it in "The Canturbury Tales". It was made very popular during King Henry VIII's reign when his first queen, Catherine of Aragon, loved it, and wore many beautiful things embellished by it. There are many beautiful portraits painted during this time with the subject's clothing covered with exquisite blackwork.

A practical use for blackwork that I read about is a little less glamorous...it was thought to be used as a way to disguise the dirt on fancy cuffs, collars and hems. Hygiene was a little lacking in those days! It was also an inexpensive way for the poorer people to mimic all the fancy lace pieces the wealthy wore.

Interesting, isn't it? I refreshed my memory on this history while looking through my book here--I'm not a walking encyclopedia, I promise!

Here's a blackwork sampler I stitched back in 2003, using this book for my patterns. Thankfully I stitched the year at the bottom, or I wouldn't have remembered when I did it--the years are all starting to roll together, know what I mean?!


Still haven't gotten it framed yet...not much of a slacker, am I? Guess I'd better grab a 50% off framing coupon from Michael's! Now I feel like stitching.....!

To change the subject, I've got another Halloween card for you:


I love the Crafty Secrets image booklets--they make cardmaking SO much fun--and so easy! I love this image from their "Halloween" Images & Journal Notes booklet. Not too much more Halloween card-making time left, is there?!

To close up, just thought I'd add a few more family Halloween pictures--hope you don't mind--my family's enjoying this (my girls are just a LITTLE embarassed--not much!) These are from October 2000--where does the time go?


My daughter Chelsea as Cleopatra--isn't she beautiful? She was 10 this year...

Sarah as Jessie from Toy Story 2. Perfect, isn't it?! As soon as she saw the movie, she KNEW what she was going to be for Halloween that year--a character made just for her, she thought! She was 5 years old...
My sweet Annie the Princess...she loved wearing this dress as much as she could! She was 4 years old here...


The Campbell women having fun at a family Halloween party at our church. Fun memories!

Hope you're almost ready for all the Halloween fun this weekend--got all your costumes ready? I don't! Off to the fabric store today--I've gotta get cracking!
See you tomorrow!


Card details:
Royal Birthday: Stamps: Cornish Heritage Farms' "Royal Birthday". Cardstock: BBlack, Elegant Eggplant, textured gold (from Michaels', PTI White, Real Red. Ink: StazOn Black, Encore Gold, Vintage Photo. Other: lace, grosgrain, gold ribbon, gold glass glitter, crystal button, brass fan charm, Pearl Stickles, SU! watercolor pencils & crayons, EK gold metallic pen, dimensionals, sponge.
Halloween Greetings: Cardstock: BBlack, PTI White, Pumpkin Pie. Ink: Vintage Photo. Other: Crafty Secrets' "Halloween" Images & Journal Notes, black pompom trim, rickrack trim, gingham, silver glitter, glue pen, buttons, sponge.